In adition to having a Fire Geo LOD for knowing when the model is hit by gun fire, the ofp engine is capable of knowing WHAT parts are hit. It is the fueltank? The engine? That way we can have more realistic damages for our model. But how will the structures in HitPoints LOD look like? As you may think, it should be similar or near identical to the ones in the Fire Geometry. Usually addon makers have some differencen between the stuctures in Fire Geo and Hitpoints LOD, but its not important for this lesson. So we will just use structures from our Fire Geo LOD and make some new named selections. Lets move:
- Go to Fire Geo LOd and hit Ctrl+A to select everything in it. Then hit Ctrl+C to copy.
- Make a new LOD and change it to HitPoints from the property list. In this LOD, hit Ctrl+V to paste the structures in it.
- Now delete all the named selections (Component01, 02, 03 etc) so that there are no named selections in our HitPoints LOD. It will look like this afterwards:
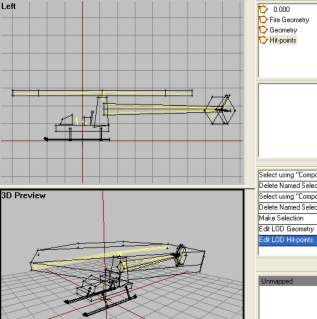
HitPoint LOD with no named selections.
Now we must make some named selections or this LOD will have little use. Simply we tell ofp like what part is the engine, what is the main rotor, etc by selecting structures and creating named selections for them. There are lots of named selections that can be used in this LOD, but we will just consentrate on the most common ones:
- Elekronika: Eletronic systems.
- Motor: The engine itself.
- Mala vrtule: Tail rotor.
- Velka vrtule: Main rotor.
- Ocas: Tail Boom.
- Stabilizator: Horizontal tail fin
- palivo: Fuel tank
- Trup: Main fuselage
- svetlo L: Left light
- svetlo P: Right light
- Pilot: Pilot
- Cargo: Passenger
So lets get to work:
- Using F2, select the block in front of the seats and create a selection for it called "elekronica".
- Next select the Tall block behind the seats (the one holding the main rotor up) and give it a selection called "motor".
- Then select the tail rotor cylinder and name it "mala vrtule".
- Select main rotor cylinder and call it "velka vrtule"
- Select the tail boom and the vertical stabilizator, leaving the horizontal one out. Name them "ocas".
- Select the horizontal stabilizator and call it "stabilizator".
- Select the seat section and call it "palivo" (yes, they sit on the fuel tank).
- Select the bottom plate, and all 6 parts of the landing gear and call them "trup".
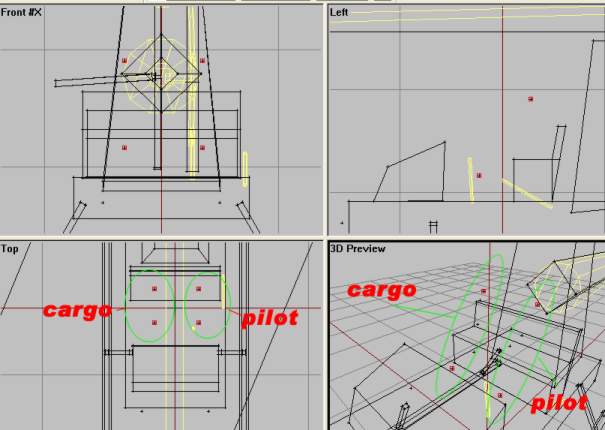
Now for the last parts of the named selection list above, we need to add some vertices (well, we have used all of our structures now, havent we). We need a vertex sympolising the pilot, one for the passenger and two at the front of the model representing the headlight positions (yes, our heli will have working lights!).
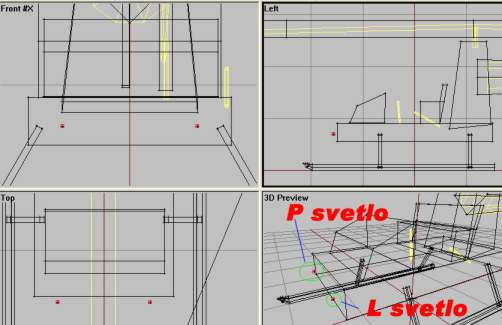
- In side view, place a vertex just in front of the bottom plate.
- In front view, make a copy of it (shift+move with x-axis locked) and place them equal distances from the centerline. Then select each one and call them "L svetlo" and "P svetlo". Like this:
- Then the last two ones, Pilot and Cargo (Passenger). Place 4 vertices in the seatarea like in the next picture. Each position has two vertrices (greater chance of hitting the pilot or passenger).
Phew, lots of names there. But now we are done with HitPoints LOD. Continue..
Back__Home__Next