Understanding LOD (Level of Detail) is somewhat hard, so I wont go into detail about what they really are and descripe each type and their use. Im only going to talk about ONE LOD, the Geometry LOD. Basically that LOD is just an invisible structure made out of vertrices that tell OFPs physic engine how to deal with your addon. As you probably know a crate is just a long big heavy box. But the engine doesnt know that so we need to tell it. And that is what the Geometry LOD is for. Without that objects like soldiers and tanks could just run trough the crate. Collision detection is not possible without it. So lets make this now, shall we:
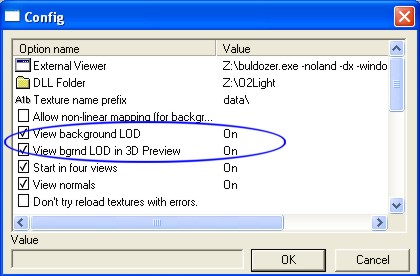
- First make sure that "View background LOD" and "View bgrnd LOD in 3d preview" under "File-Options" is turned on.
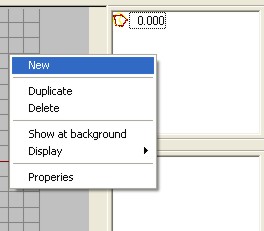
- Find the "LOD window" (usually top right with only one item listed saying "0.000". If you can`t find it, press Alt+L.) and click your right mouse button. Select "New" and a new entry in the LOD window should appear (called something like "1.000").
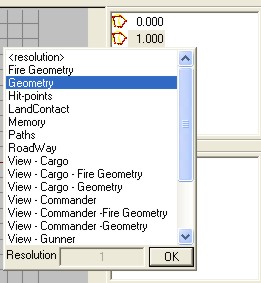
- With the new entry selected, right click again and select "Properties". Find the one called Geometry from the list and hit OK.
Now you will see that our crate is turned yellow. If you doubleclick the "0.000" LOD you will see that its back to normal. Thats because our crate isn`t in the Geometry-LOD but in the "0.000" LOD. But because we turned on "View background LOD" and "View bgrnd LOD in 3d view" under "File-Options" a "ghost" of our crate is being displayed in our new empty LOD, the Geometry LOD. This is usefull because we need to now exactly where the original crate structure is during the next few steps. Now doubleclick the "Geometry" LOD and lets continue. We are going to create another crate structure (only this is about 95% its size) so the OFP engine can do proper collitiondetection on. The reason why we have to make another crate structure for this is that Geometry LOD is invisible & therefore can`t be textured. Now lets get moving:
- In the Front view, hit F7 to bring up the dialog again. But instead of 8,4 & 4 for the x,y & z size, make it 7.9, 3.9 & 3.9.
- Now follow the steps in the last tutorial where we rotated & moved the crate upwards. The new crate should fit just inside the old one. It is important that it doesn`t break through the original.
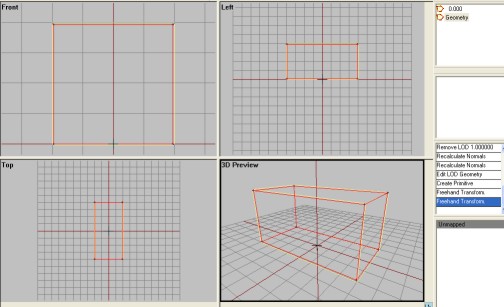
Now OFP know how to deal with collition detection. But it can`t be sure on how heavy the crate is. It it 1000kg or only 1/8 kg. And is the backpart of the crate more heavier than the front? Now lets put som Mass to our crate:
- Find the Apply Mass dialog. If you dont see it, press Alt+M and it should show up beneath the view panels.
- Still in the Geometry LOD, press Select all (Ctrl+A) and the field for entering mass should become aviable.
- Enter "200" kg and press "Apply". Small grey boxes should appear at the structure vetrices.
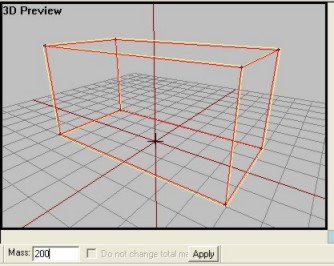
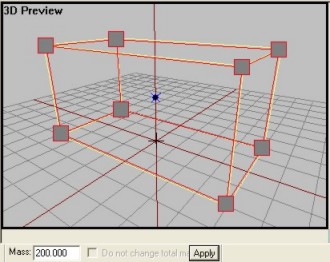
As you probably have guessed, the grey boxes indicate how much weight the vertex has. Since the weight of the whole crate is ballanced, all boxes should be the same size. To apply weight to a single vertex, press F4 (vertex select mode), select a vertex and enter value. But thats not for this tutorial.
We also have to save a selection for this LOD to work (I dont know why, but if we dont do this, the Geometry LOD will fail). Do this:
- Press Ctrl+A to select the Geometry LOD structure.
- Find the "Named Selections" window below (under Window-menu), click the right mouse button and select "new". Your selection will then be saved. Call the selection "Component01".
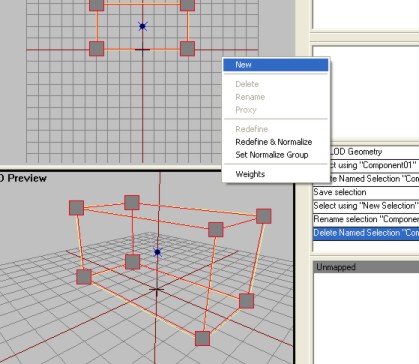
Now each time you doubleclick on the "Component01" in the selection window the content on the Geometry LOD should be selected. Note that each LOD have their own set of saved selections. Therefore "Component01" will only be on this list when you have already doubleclicked "Geometry" in the LOD window.
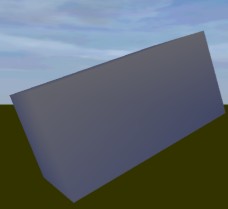
Now the box is nearly finished. But if you have looked in the external viewer, the crate looks very UGLY. But dont worry, in the next tutorial we will put some nice textures to it.
<-Back__Home__Next->